Optional JavaScript connector
Starting the API
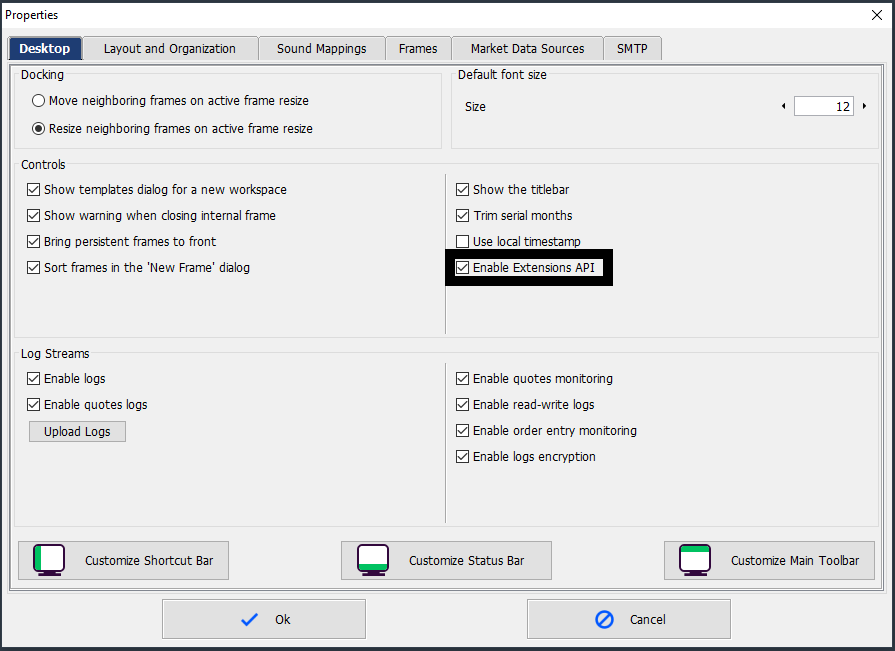
Before starting to develop your application, your user needs permission from us. Once you received the permission, you can login in your QST desktop application. Go to General -> Properties, or you can do the same thing using Ctrl + P from your keyboard. Once you are in the Properties frame, you must select Desktop. If you are in the right place you must see a check box entitled Enable Extensions API If is already checked, you are good to go, if not, you must check this option, press Ok then logout with save settings and make a fresh login in the app.
Demo page
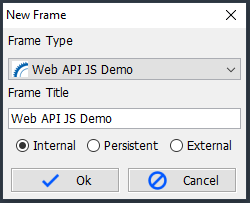
In order to ilustrate the API we created a demo page, where you can test all the available functions. The frame can be found in the frames list, under the Web Pages and is named Web API JS Demo. You can use your keyboard, press Ctrl+Shift+N, then search for Web API JS Demo like you see in the image below.
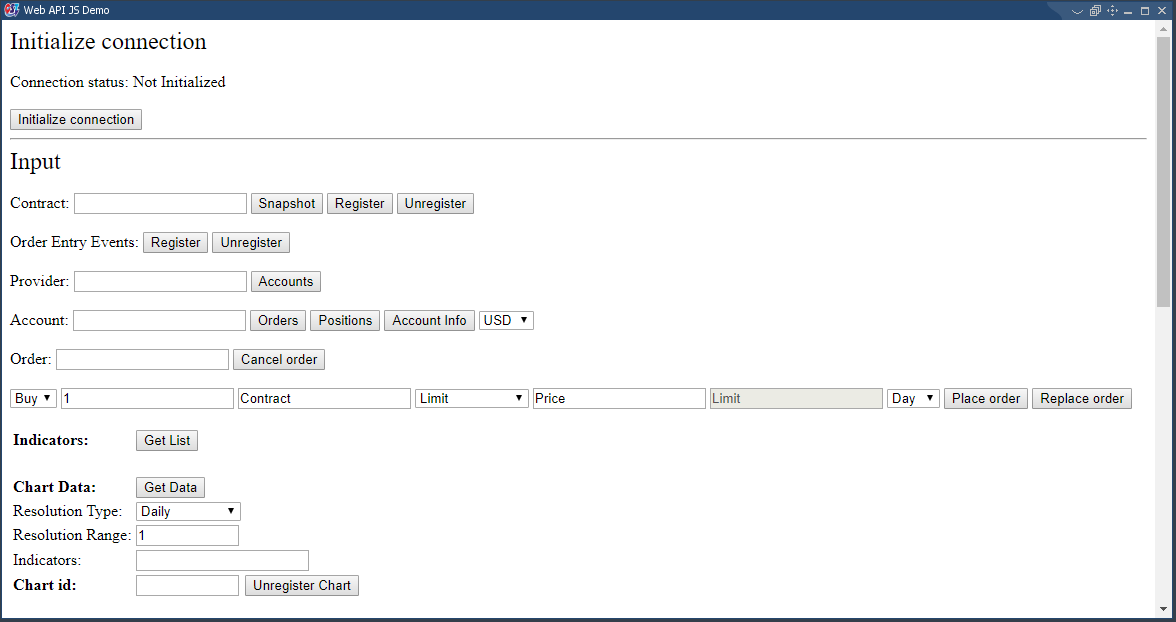
If you followed these steps you should end up with this frame:
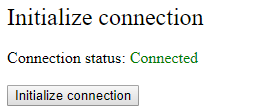
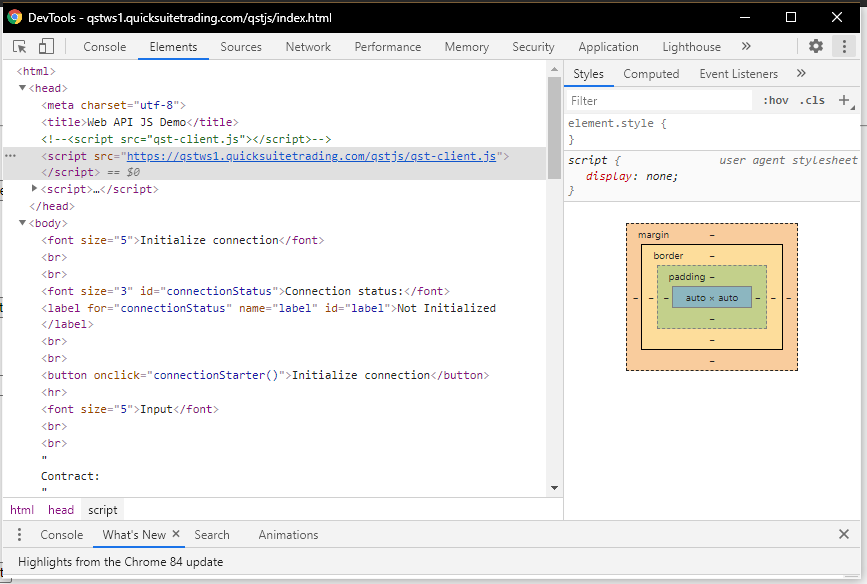
At this point, because you have Enabled Extensions API, you can press the Initialize connection, and the Connection status should change in Connected just like you see in the image below.
If you want to see the logic behind this demo page, you can open this page in your browser of choice by using this link: https://qstws1.quicksuitetrading.com/qstjs/index.html. Once your page loaded, you can press F12 on your keyboard, and the developer tools must open in your browser. Here make sure that you select Elements. This option may be different from browser to browser, but you should see something as in the image below.
Note
The source code for our library can be seen by accessing this link via a web browser: https://qstws1.quicksuitetrading.com/qstjs/qst-client.js
How to integrate the JavaScript connector in your application
In order to gain access to our QST Websocket API, by using the JavaScript connector, you need to add this section of code in your application: <script src=”https://qstws1.quicksuitetrading.com/qstjs/qst-client.js”></script>. This line of code is placed in general in <head> tag, below you can see an example:
<head>
<meta charset="utf-8">
<title>Web API JS Demo</title>
<script src="https://qstws1.quicksuitetrading.com/qstjs/qst-client.js"></script>
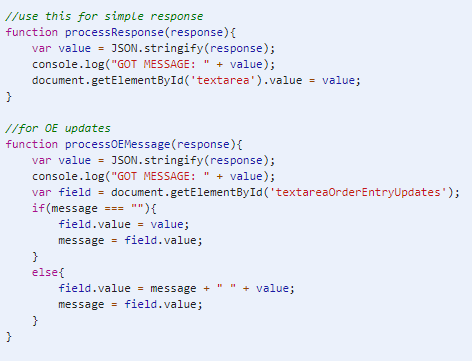
After obtaining the library like you saw in the example above, you must do a very important step. Before calling any other functions from our JavaScript connector, you must call the init function. The init function looks like this: init(asyncCallback). As mentioned, this is a very important step, because this function will make the connection between your application and our Websocket API. This function takes as a parameter an asynchronous callback function, which is called every time a quote update arrived. In other words, you must define a function that is used as a callback, and handles the logic for your application when you receive a quote update. In our case we use this callback function only to display quote updates in a text field.
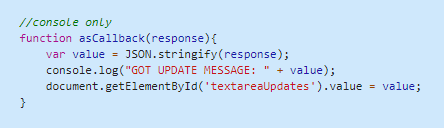
Something similar must be done in order to receive Order Entry Updates. From our library, you must call a function called registerOrderEntry. This function takes as parameters two callback functions. The first one is called if this request is successful or not, therefore is an synchronous callback function, and the second one will be an asynchronus callback function, called every time when a new Order Entry update is sent from our app to your application. If you look at our source code for the demo page, you will see that registerOrderEntry is happening when the user presses on the Register button.

Once the Register button is pressed, registerOrderEntry function is called from Extensions JS Api.

Here we have two functions passed as parameters, the first one, processResponse is used to see if the register process ended up successfully, it will be a synchronous callback function, and the second function processOEMessage is used to receive the Order Entry updates that will come from QST so is an asynchronous callback function.
If you look at our source code for this two functions, we use them to display the status for the request and the Order Entry updates in a text area, but in your case you must handle the updates in your own way.
Warning
These examples are provided only to showcase the functionality of the connector, to show how we used this library in our demo page. You must define your own logic, specific for your application in every callback function that you pass through our function. This was a short summary to explain the most important steps and make the development process a bit easier. For more details related to other functionality from the JavaScript connector, please scroll down in this document.
How to test your application
Let’s say you have an alpha product that needs to be tested. In this case, again, you must have permissions to use the Extensions JS Api (for this check again point 1 from this tutorial). To test you application, make sure that you have logged into QST, press Ctrl+Shift+N to open a new frame, and search for Internet.
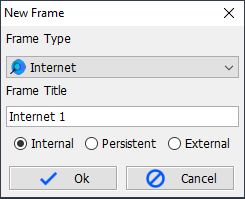
Once you have oppend this frame, you can enter your application address in the Address Bar

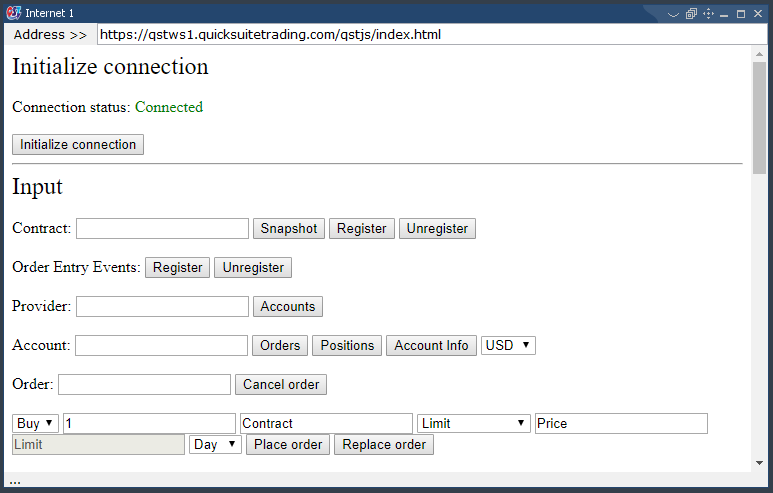
The image below shows our demo page running inside the Internet frame.
Initialize connection
Warning
It is mandatory to call this initialization function before any other, otherwise the connector has no link with its data source. The main scope of this function is to establish the connection with the host and set up the callback for the async messages.
function init(asyncCallback);
Note
Where asyncCallback it’s the function called when a new quote update is received.