The Send Order Request
NOTE: This method has been deprecated as of version 8.0 and will be completely eliminated in version 9.0
The purpose of this functionality is to provide the client, a way to place QST orders via Excel. The orders can be placed either directly in the Excel spreadsheet – via the RTD function or with the help of a VBA script.
The reqSendOrder format
reqSendOrder(xOrderID | xSymbol | xQuantity | xPrice | xAccount | xSide | xOrderType | xLifetime | xOrderExpirationDate | xIncrementalQuantity | xTag | xLimitPrice)
The standard call of the RTD function which uses reqSendOrder:
=RTD(“qst.rtd”, “”, “reqSendOrder(xOrderID | xSymbol | xQuantity | xPrice | xAccount | xSide | xOrderType | xLifetime | xOrderExpirationDate | xIncrementalQuantity | xTag | xLimitPrice)”)
The reqSendOrder parameters are explained below:
xOrderId – the client order id, chosen by the user
xSymbol – the QST contract symbol, ex. ZCZ20
xQuantity – order quantity
xPrice – QST contract price
xAccount – account on which the order will be placed (QST needs to be connected to this account)
xSide – side of the order: BUY or SELL
xOrderType – QST order type, ex. LIMIT, MKT, STOP
xLifetime – order lifetime, ex. Day, GTC, GTD
xOrderExpirationDate – the expiration date of the order (applies only to GTD lifetime)
xIncrementalQuantity – the incremental quantity used when placing Iceberg contingencies
xTag – a tag to identify the client, used as a Special Instructions in QST
xLimitPrice – the limit price when placing STWL orders
Note
The order of these parameters is mandatory, ex. Parameter 1, xOrderId, cannot be switched with parameter 2, xSymbol.
Examples of reqSendOrder requests.
- placing a Buy 2 ZCZU20 @321^6 LIMIT, Day lifetime with the tag “Client1” on account 9999:
reqSendOrder(1001 | ZCU20 | 2 | 321^6 | 9999 | BUY | LIMIT | Day | | | Client1 | )
- placing a GTD order with expiration date June 5th 2020, Sell 1 ESZ20 @MKT:
reqSendOrder(1002 | ESZ20 | 1 | | 9999 | SELL | MKT | GTD | 2020-06-05 | | | )
- placing an Iceberg with incremental qty 3, Buy 10 ECLH21 @32.83 LIMIT, GTC lifetime, with the tag “Client2”:
reqSendOrder(1003 | ECLH21 | 10 | 32.83 | 9999 | BUY | LIMIT | GTC | | 3 | Client2 | )
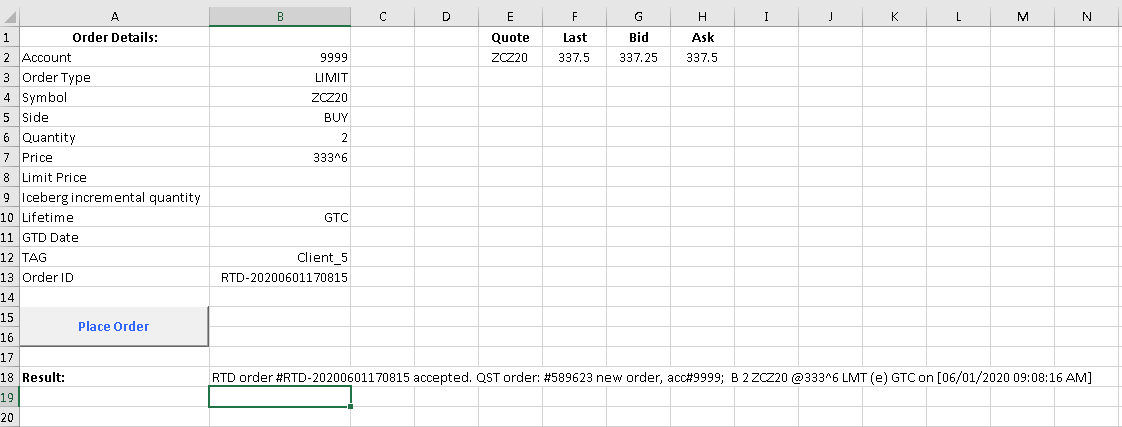
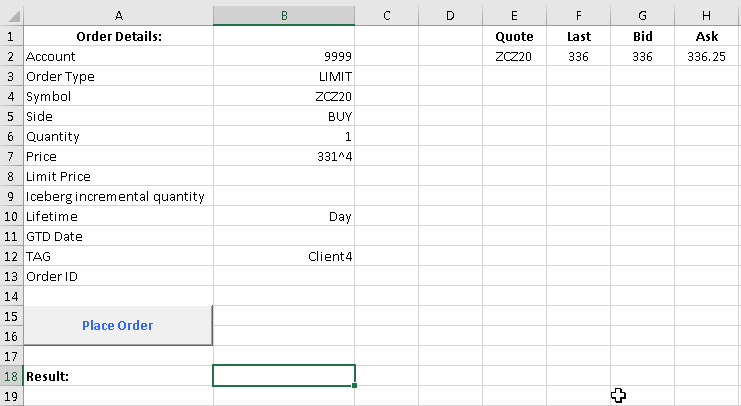
2. Placing orders via RTD function.

3. Placing orders via VBA script.
add quote(s) live-linked to QST; in the demo, the last, bid and ask prices are used;
fill only the necessary order details (the parameters needed by the reqSendOrder) in the Excel spreadsheet;
add a button in the Excel spreadsheet which will trigger the order placement by executing the VBA script;
add a Result cell which will store the order placement result;
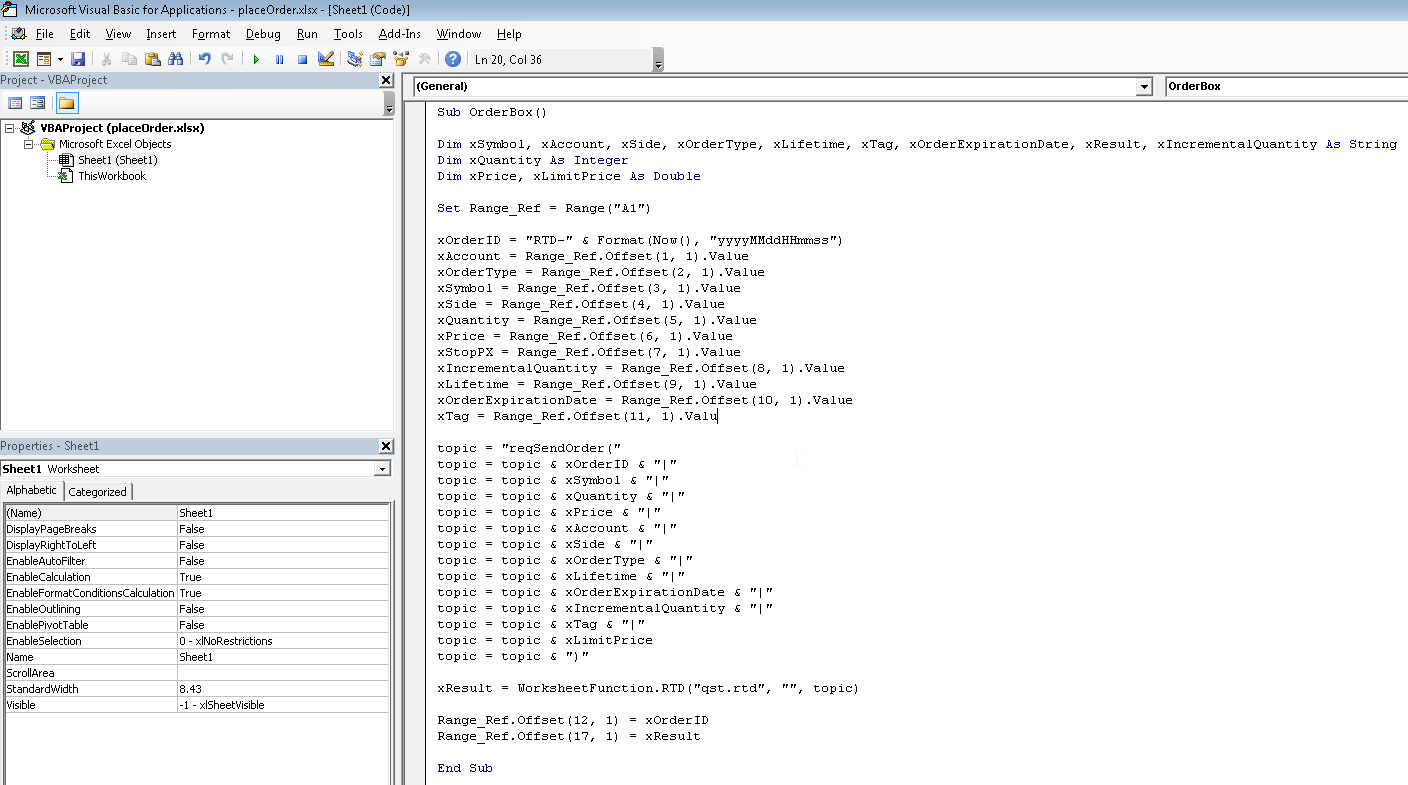
Sub OrderBox()
Dim xSymbol, xAccount, xSide, xOrderType, xLifetime, xTag, xOrderExpirationDate, xResult, xIncrementalQuantity As String
Dim xQuantity As Integer
Dim xPrice, xLimitPrice As Double

Set Range_Ref = Range("A1")

xOrderID = "RTD-" & Format(Now(), "yyyyMMddHHmmss")
xAccount = Range_Ref.Offset(1, 1).Value
xOrderType = Range_Ref.Offset(2, 1).Value
xSymbol = Range_Ref.Offset(3, 1).Value
xSide = Range_Ref.Offset(4, 1).Value
xQuantity = Range_Ref.Offset(5, 1).Value
xPrice = Range_Ref.Offset(6, 1).Value
xStopPX = Range_Ref.Offset(7, 1).Value
xIncrementalQuantity = Range_Ref.Offset(8, 1).Value
xLifetime = Range_Ref.Offset(9, 1).Value
xOrderExpirationDate = Range_Ref.Offset(10, 1).Value
xTag = Range_Ref.Offset(11, 1).Value

topic = "reqSendOrder("
topic = topic & xOrderID & "|"
topic = topic & xSymbol & "|"
topic = topic & xQuantity & "|"
topic = topic & xPrice & "|"
topic = topic & xAccount & "|"
topic = topic & xSide & "|"
topic = topic & xOrderType & "|"
topic = topic & xLifetime & "|"
topic = topic & xOrderExpirationDate & "|"
topic = topic & xIncrementalQuantity & "|"
topic = topic & xTag & "|"
topic = topic & xLimitPrice
topic = topic & ")"

xResult = WorksheetFunction.RTD("qst.rtd", "", topic)

Range_Ref.Offset(12, 1) = xOrderID
Range_Ref.Offset(17, 1) = xResult

End Sub
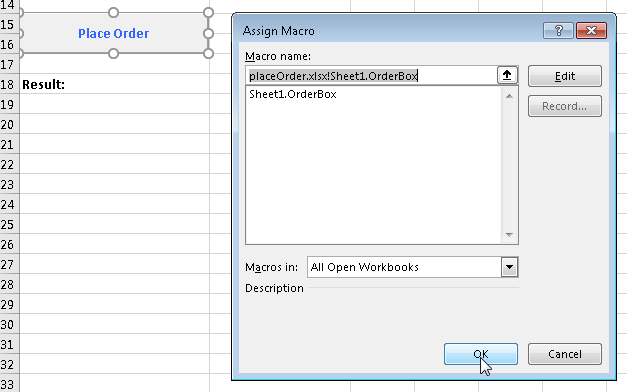
The next step is to link the button from the Excel spreadsheet with the VBA script:
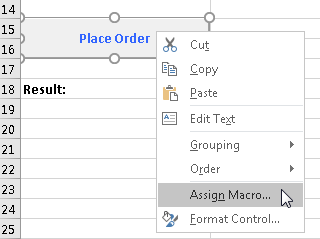
and then select the corresponding macro:
In the end we can test in Paper Trading and click the Place Order button to place the desired order, observe the order placement result from Excel and then check the Orders and Positions Monitor.